An Elizabethan Embroidered Jacket
(Based on a jacket in the Maidstone Museum and a jacket in the Museum of London)
|
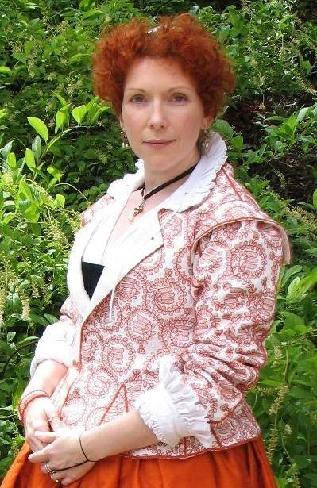 |
| picture copyright R. Mellin, 2006 |
|
|
This jacket is based on two extant late 16th century/early 17th century jackets. This one, which was the model for the embroidery, is in the Maidstone Museum, Kent, the other (pictured below) is in the Museum of London and is the model for the jacket's shape and trim. I combined the two because for a long time, the only picture I had of the Maidstone Jacket was a small detail photo in Mary Gostelow's Blackwork.
|
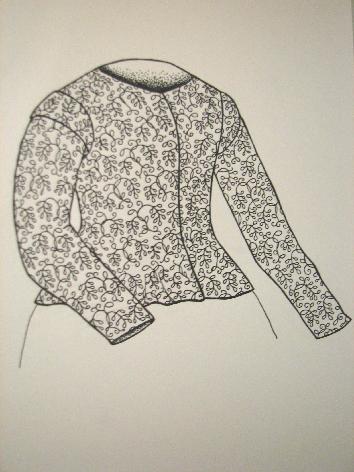 |
| Museum of London Jacket |
|
Most of the pictures of 16th-century jackets and surviving jackets are very rich, incorporating gold and silver spangles, polychrome silk thread, and gilt thread in abundance; the Maidstone and London jackets are more interesting to me because they aren't highly decorated, nor are they sewn with elaborate stitching that takes a long time to master. In my estimation, this makes them more likely to be amateur rather than professional work.
Embroidery was an expected accomplishment for women in the 16th century, despite the absence of jobs for them in the male-dominated embroiderer's guild, and the desire to show off one's skills coupled with a love of adornment of house and person led to the creation of extraordinary works of beauty from the hands of women. Too often in the past this was dismissed as mere domestic work, but I feel that the complexity and loveliness of many of these embroideries elevates them to true works of art.
A 16th century woman determined to create something fashionable and beautiful could well have created either of these jackets; the materials are simple, and available to any woman who could afford them. The relative prosperity of the new yeoman classes at the end of the 16th century meant that a larger number of women could afford the silks to embroider their clothes than ever before, and the explosion of domestic needlework at this time attests to their enthusiasm.
|
 |
| picture copyright V. Dye, 2006 |
|
Unlike the embroidered coifs and shifts that survive, the jacket is a tailored item. It is quite possible that a woman would have a professional tailor mark out the pattern shaped for her before embroidery1. The embroidery design is simple enough that it could be drawn by the woman herself, but it is also possible that she took it to a professional embroiderer for layout, or that she got the pattern from a book2. Either way, the pattern would be laid out on an uncut piece of linen for ease while embroidering.
Once the pattern was completely embroidered, she might have sewn it together herself, or she might have taken it to a tailor to be sewn. While women did a lot of domestic sewing, certain tailoring tasks, like properly setting in a sleeve, were closely guarded skills of the tailor's guild, and such work would not generally be taught to women3. I was working from photographs and the pattern breakdown of the Laton jacket in Janet Arnold's Patterns of Fashion4, but it appears that the sleeves are completely set in, which takes a bit of skill to do smoothly (i.e., without pleats or gathers).
|
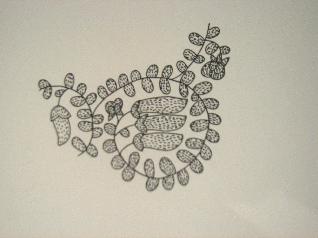 |
| Embroidery detail on the Maidstone Jacket |
|
The embroidery on both of the jackets incorporates vines; the Maidstone design (the one I copied) is of curled vines with peapods and leaves, and the London design is of drooping vines that almost look like wisteria blossoms (wisteria is an Asian vine, and was not known at the time, though there are several kinds of flowers with drooping bracts).
|
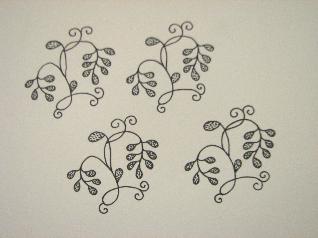 |
| Embroidery on the London Jacket |
|
Both are monochrome; the London jacket is done in the more usual black silk, but the Maidstone jacket is worked in a delightful red silk. This is not the only example of a non-black monochromatic piece; an unfinished nightcap in the Carew-Pole collection is entirely worked in a vibrant green5.
|
 |
| picture copyright V. Dye, 2006 |
|
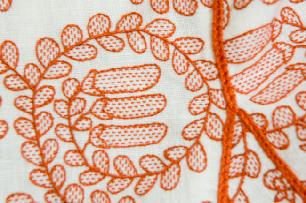
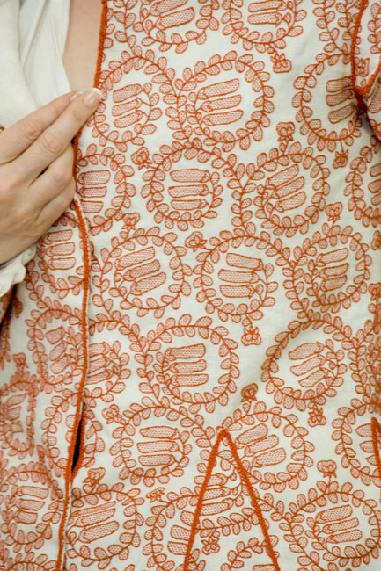
The original embroidery is filled with tiny speckles that follow the line of the pea pods. I chose to follow the line of the linen weave for a more uniform look, with each speckle stitch two threads long. The stems on the original are cable stitched, but I did a double running stitch, then went over the line with a surface wrap stitch to create a raised stem that would have visual and textural appeal. Both embroidery variations are correct for the period.
For the reproduction, I used six yards of linen (including lining), and 2325 yards of tangerine silk thread. The very first decision I made after deciding to make the jacket in the first place was to hand-sew the entire jacket. I made this decision because it seemed almost blasphemous to machine sew the jacket together after putting in so many hours on the embroidery.
I originally charted the design for a coif; to transfer the design to the linen pieces for the jacket, I took the ink drawing I did for the coif and photocopied it multiple times to create a square of the design large enough that I didn't have to draw it out over and over for each piece. I transferred the design to the fabric by pasting the design to a large window and taping the fabric with the pattern pieces already drawn out over it. In essence, I created a large vertical light table to transfer the design. I then drew the design onto the fabric using a very fine point waterproof, archival ink pen. In period, this transfer would have been done by pricking the paper over the design and dusting it with charcoal to transfer the design, or using a light and a frame to trace the design in a manner similar to the one I used.
|
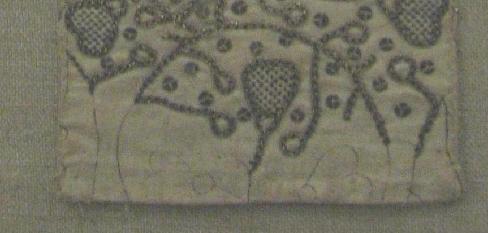 |
| An example of ink drawing under the embroidery (V&A Museum, London) |
|
Using ink to draw out the design is period; there is a lovely piece of embroidery in the Victoria & Albert Museum that clearly shows the ink underdrawing beyond the finished work (pictured left).
|
In the 1500s, the linen was probably ironed and starched before inking to provide a smooth and less porous surface that would minimize the ink bleeding. While dedicated to period technique, I was unsure how effectively I could reproduce period ink and drawing materials, so I used a very fine point waterproof drafting pen for safety.
|
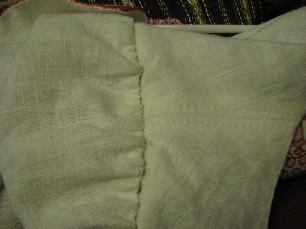 |
| reproduction - shoulder seam |
|
Hand sewing the seams required a slight leap of faith; in the past, I had hand sewn seams using a straight running stitch, but the results weren't satisfactory, no matter how tiny I made the stitches. Discussions of sewing technique with employees of the Jamestown Settlement and Museum revealed that the extant pieces have stitches so tiny that they literally only picked up one or two threads at a time6. Janet Arnold's books did not go into detail about how straight seams were stitched, and the few examples I saw showed that the raw edge of the fabric was turned under and stitched into place, but it was hard to see anything more.
Experimentation with different methods showed that the edges were turned under and sewn first, then the seam was sewn by whip-stitching the very edges of the pieces together.
|
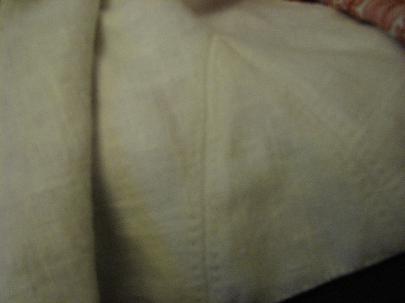 |
| reproduction - inserted gore seam |
|
This method not only produces a seam that looks exactly like the period seams7, but is as strong or stronger than machine sewing, and works as well for curved seams as straight ones. This also obviates the need to clip the fabric on curved seams (which weakens the seam and the fabric). I found that by using this technique, the curved seams on the sleeves and on the back of the body of the jacket lay perfectly flat, even without ironing.
|
 |
| picture copyright Victoria Dye, 2006 |
|
I made the trim by braiding the same silk I used for the embroidery into a four-strand plait. I laid out the trim in a slightly different manner to the London jacket in that I covered every seam. This appeals to me more from an aesthetic point of view, and is a period decorative style.
I have no record of how the two jackets were closed; two methods used on extant jackets are ribbon ties or hooks and eye8. I couldn't decide which I wanted, so for the moment I have no fastenings attached, and I pin the jacket closed with straight pins (also a period method of fastening clothes).
|
 |
| Picture copyright 2006, R. Mellin |
|
Once it was done, I could calculate the time and the material costs, and make a better guess about whether the jacket would be a manageable undertaking for an amateur, and I do think it is a possibility that this could be done.
For the modern re-creator, the cost was not materials, but time. The jacket cost less than $100 total in materials, but took 1,947 hours over a year and four months to complete. I really did spend all my spare time on this, almost to distraction (and was forced to take a two-week break by my husband at one point).
The heavily embroidered polychrome and gold jackets that are featured in most treatises on Elizabethan embroidery were most likely made by a professional shop, but it is quite conceivable that this more delicate version could have been made by the woman who wore it, especially if a professional tailor made it up once the embroidery was done.
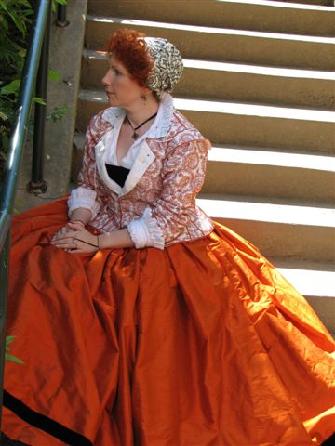
The jacket turned out to be very comfortable to wear; though fitted, it is not restrictive or awkward. I made a silk skirt in a matching orange (tangerine) using the same seaming technique as the jacket (using waxed silk thread to sew, rather than linen), and even though the skirt was completely hand sewn, it only took about 50 hours, as opposed to the 1947 hours for the jacket.
The first time I wore it, I was amused that many people thought I had bought the material ready-made for the jacket. I took it as a compliment.
|
Travels with My Jacket
My jacket has been featured in the Plimoth Plantation blog The Embroiderers' Story as a model for planning the time involved in the project. You can see it, and the progress they've made on their marvelous jacket by clicking on the link.
The research on their jacket project has taught me a lot more about embroidery of the period, and I'm honoured to be one of the embroiderers working on it. If you're interested in being involved, contact them and get a sampler packet! I can't emphasize enough how cool their work is, and you really shouldn't miss the opportunity to become involved (or just to read about) this historically groundbreaking effort.
|
Notes:
1. Elizabethan Embroidery, George Wingfield Digby, 1963. Mary Queen of Scots, while imprisoned at Lochleven Castle, petitioned for "an imbroiderer to draw forth such work as [she] would be occupied about". The implication is that professional embroiderers were useful as much for drawing out the design as sewing it. Professional embroiderers were all men - it was a guild controlled activity, and as such, closed to women, no matter how skilled. I am inclined to think that many women either had someone draw out the pattern for them, or got the pattern from a book, similar to amateur embroiderers today, who use pre-printed pattern kits or books to chart their designs. Most of the embroiderers I know are more comfortable sewing than drawing, and I suspect the same was true of many 16th century women.
2. The Victoria & Albert Museum, London, has an early 17th century smock that is embroidered (in pink) with recognizable motifs from a popular embroidery pattern book of the day, "A Scholehouse for the Needle" (1632).
3. Sleeves that are laced in or partially sewn were more common than completely fitted sleeves, and do not require the same exactness or skill in fitting. Accounts seem to show that men did most of the tailoring in London.
4. Patterns of Fashion: The cut and construction of clothes for men and women c.1560-1620, Janet Arnold, 1985. Pages 50-51, 120-121.
5. Blackwork, Mary Gostelow, 1976, page 77, and Mary Gostelow's Embroidery Book, Ibid, 1978, page 34. Other brightly coloured single colour embroidered items have survived - there are two smocks in the Victoria & Albert museum sewn in pink silk, and the shift at Wadham College, Oxford, that is traditionally said to have been worn by Dorothy Wadham, is sewn in a pale lilac silk (that was possibly once much brighter).
6. Jamestown Settlement and Museum, the historical clothing department. The researchers there do a lot of work on how materials and stitching fade and wear, and they have been very helpful with information on period sewing technique.
7. The Tudor Tailor: Reconstructing Sixteenth-Century Dress, Ninya Mikhaila and Jane Malcom-Davies, 2006. Page 17 has an excellent close-up photograph of a period smock seam that shows the raw edges stitched down and the whip-stitched seam.
8. Patterns of Fashion, pages 50-51.
|
|
I am very grateful to Victoria Dye of Victoria's Images for her excellent photography. Any imperfections in the pictures are mine.
|
|